The ‘Bodiam’ balustrade consists of large, square pier blocks with sections of balustrade running between them. Setting the pier blocks out accurately is essential and it will make the rest of the fixing process easier. First, check that the area is level enough to build the balustrade on. Next, mark the positions of the pier blocks and accurately measure the distances between piers to ensure that you have enough sections of stonework.
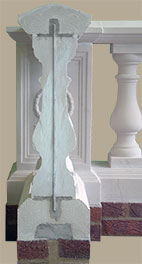
Place the pier blocks in positon using four wooden wedges underneath each pier. Use a level to ensure that the piers are vertical and a string line to ensure that the piers are square on to each other and in line. The gap underneath the pier block should about 20mm. Mix up a mortar consisting of 5 parts soft sand to 1 part OP cement and pour some of it into the hole in the centre of the pier block. Using a baton or a gloved hand, push the mortar out into the gap under the pier until some squeezes out around the outside of the pier.
When mortar squeezes out of a joint between stones, leave it until it stiffens (1-3 Hrs) and then rake some of it out of the joint. This leaves a recess for the pointing mixture at a later time. By raking it back once it has dried slightly you will not smear the edges of the stone with grey mortar, if any mortar does get onto the surface of the stonework then just leave it to set and clean it once all of the construction is finished.
When the mortar has stiffened, remove the wedges and lay the plinth course between the two pier blocks. Mix a mortar bed of 5 parts soft sand to 1 part OP cement to go under the plinth course. Lay the plinth course on the mortar bed using a string line and level to keep it straight and level. Ensure that some mortar finds its way into the hollow channel underneath the plinth to key the sections together. Now measure the distance between the two piers, calculate and mark the positions of the holes for the baluster retaining pins.
The holes for the baluster retaining pins can now be drilled into the plinth (20mm dia. and 50mm deep). Clean the holes and then fix the balusters in position on beds of 3:1 mortar. Use a string line and vertical level to fix the balusters and ensure that the spacings between them are equal. Again allow this mortar to stiffen and then rake back the joints. The mortar holding the balusters should now be allowed to set (24 Hrs if poss).
Mark and drill 20mm dia. X 50mm holes in the copings to accept the top retaining pins of the balusters and then fix the copings onto the tops of the balusters using 3:1 mortar. Start work from one end of the balustrade and use the string line and level to keep the copings straight and level. Frogs have been cast into the ends of the copings, when filled with mortar they will form a secure key between the copings. Rake back the excess mortar from the joints as before.
Repeat the above process until all pier blocks and ‘bays’ of balustrade have been fixed. Lastly, fix the relevant pier caps onto the piers using a 3:1 mortar mix.
The balustrade is now ready for pointing. Only mix up a small amount of pointing mixture at any time (about a coffee mug). Add water until the mixture has the same consistency as toothpaste. Excess water will cause the mixture to smear and stain either side of the joint. Point up using the tip of a pointing trowel or small pointing tool. Once the mortar and pointing mixture has set and hardened, any mortar spills or stains can be removed by the following method.
Cleaning is best done with a 16% Hydrochloric Acid solution, this is sold in DIY and Hardware shops as ‘Patio Cleaner’.
Observe the safety precautions on the container.
Soak the stained area with a hose pipe for several minutes so that the water is no longer being absorbed by the stonework. Apply patio cleaner to the stained area with a paint brush and it will fizz for a few seconds, hose the solution off and apply again. Repeat this until the stain has disappeared.